
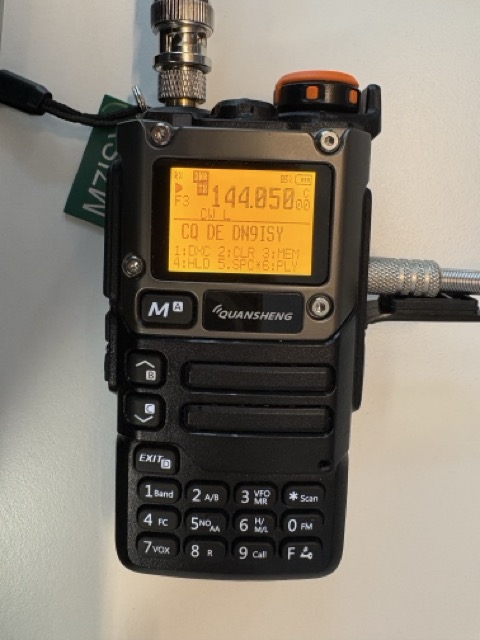
I am currently learning CW, and already have a compact paddle for my YAESU FT-818nd. I saw that the Quansheng UV-K5 / K6 can also transmit CW after the installation of a specific firmware, and will type the letters that you transmit. I wanted to use this to transmit into a dummy load, and practise writing out letters and numbers (and also to help stay motivated). This firmware, referred to as CEC-Firmware, can be found at this link: https://github.com/phdlee/uvk5cec/releases. At the time of this writing, the latest version is 0.3v.
As there are detailed tutorials available online for flashing firmware onto your radio, I won’t delve into that process here.
Unfortunately, the CW paddle that works perfectly with my FT-818nd did not function at all with the Quansheng. It seems that the pin configurations for a standard CW paddle differ significantly from those of a Quansheng CW paddle.
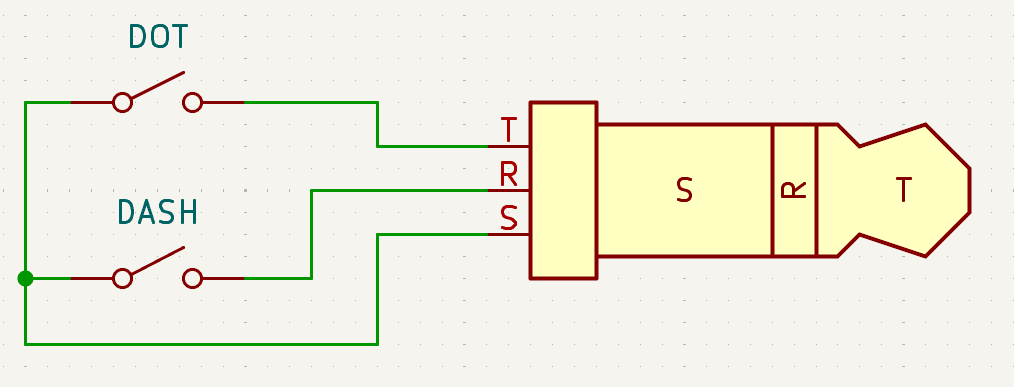
A typical CW paddle consists of two switches: one for a “DOT” and another for a “DASH.” It requires a three-conductor cable, with a specific conductor being shorted to a “common” terminal based on whether “DOT” or “DASH” is engaged:
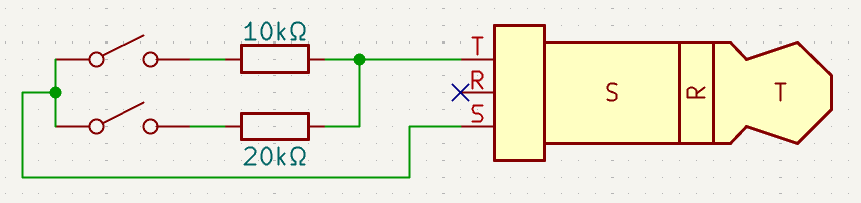
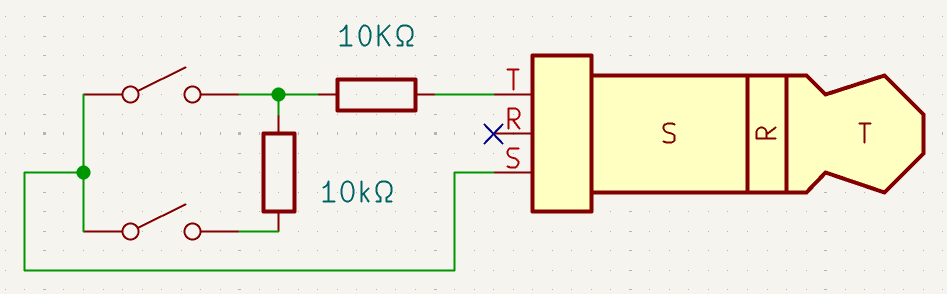
In contrast, the Quansheng paddle requires a different wiring setup:
To create your adapter cable, I sourced a pre-made 3.5mm headphone jack extension cable for around €2. Although mine had four pins rather than three, this distinction did not cause any issues. I underestimated the fragility of the individual strands in the wire, which made soldering quite challenging without risking breakage. If you’re comfortable with precise soldering, repurposing a pre-made extension might save you some money compared to purchasing wire and connectors separately. However, if I had to rebuild this cable, I would opt for separate purchases and utilize thicker wires.
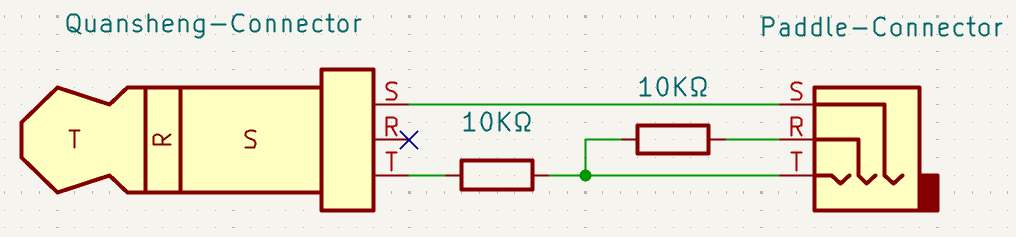
I cut the extension cable in half since it was too delicate for solo strand operation, and then soldered in two resistors, resulting in a setup that looked like this:
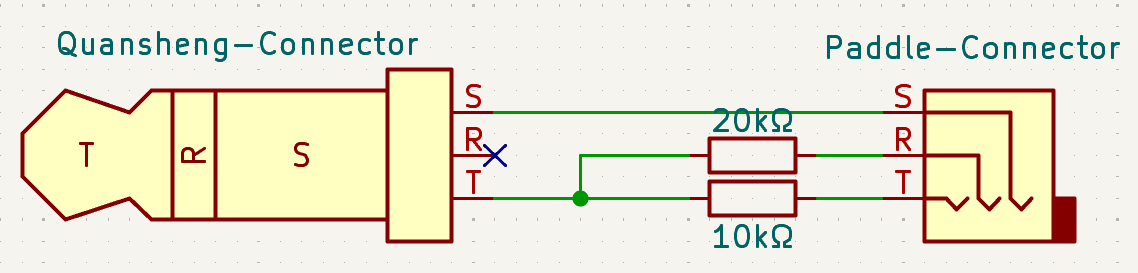
Before you make a permanent connection for R and T on the paddle connector, double-check that the DIT/DOT and DAH/DASH pins are correctly aligned with their respective sides of the paddle. If you need to swap the connections for DIT and DAH, simply interchange the R and T connections on the paddle side.
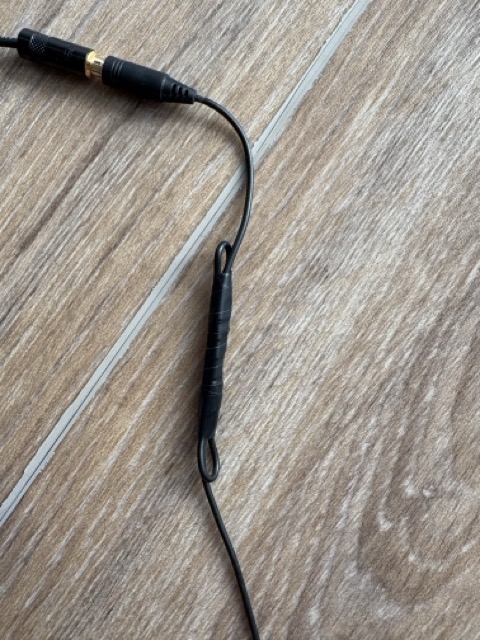
By using 10kΩ /and 20kΩ resistors, adjusting anything in the radio’s firmware should not be necessary, and everything should work seamlessly right from the start. Finally, I folded a loop into the cable and used electrical tape for strain relief:
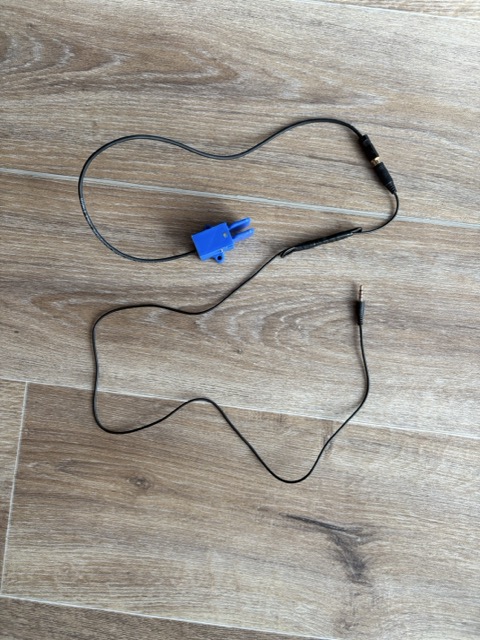
The whole cable, plus the CW paddle looks like this:
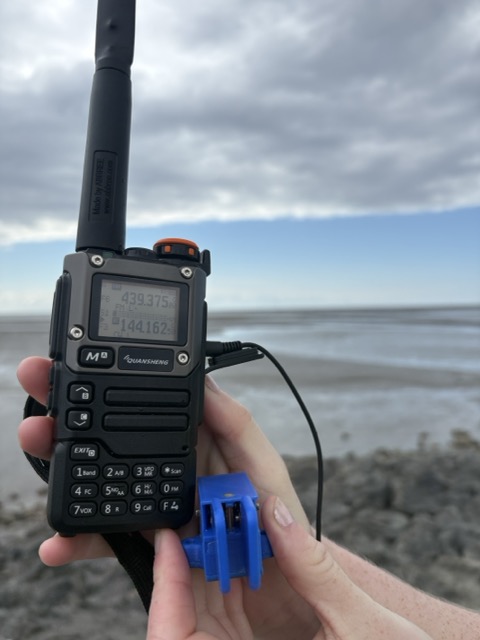
Its great fun to practise with the paddle and to see what you are typing. The paddle and cable are also very easy to bring with you, and use when you are out and about.
UPDATE 01/2026
Before this update, I was not aware of “squeeze keying”, where one would press both paddles at the same time. I therefore did not test my first version of this schematic/cable with it. Thanks to Chris (MM0UHR) and Chris (KI6CR) for pointing that out to me.
I updated the schematics on this article, but will keep the original ones below for reference. When you intend to make that cable yourself, stick to the updated schematics above.
This circuit seems to have trouble with squeezing both paddles at the same time. I had to use a 20Ω resistor in parallel with the 10Ω to give 6Ω when both paddles are pressed.
Hey Chris,
Thanks a lot for the addition. I actually never considered the case when both paddles are being pressed at the same time.
Could you please share more details on how the Quansheng misbehaved when pressing both paddles? I am also curious, why would you want to have both paddles pressed at the same time? Or does it happen because you are so fast in keying?
I am glad that you already found a working solution for this, and thank you for sharing it.
Holding both keys makes it alternate between dits and dahs. Whichever you press first is the lead character, then alternates. That alternating rhythm is the iamb the keying method is named for.
That means a full stop is just a case of pressing both keys with the dit key being pressed slightly in advance. Similar with C, K and R. For L, F, Q and Y need you to hold one key and tap the other at the right moment.
I’ve resoldered my cable so I can’t test now, but as I recall it just ignored the second key being pressed. Maybe it always switched to continuous dits.
I am assuredly not too fast in keying. Maybe one day.
Thanks so much for the reply. I am new to CW, and did not know about that keying technique – I am going to have to give it a go now, that is going to make keying so much easier!
Hi, this article needs an update as the commenter Chris indicated. Squeeze keying is common and is necessary for this to work.
The radio is looking for three values. 10k for DIT, 20K for DAH, and about 6kOhm for BOTH. You need to redraw the diagram to show a dit path 10k wired straight to the tip lead, and a 20k wired straight from dah to the lead.
Hey Chris,
thanks a lot for the comment. I have updated the schematics in the article now.
Though I haven’t built a new cable for myself yet, so I haven’t tested myself if it works as expected now.
Thanks a lot
Izzy